
Using either a stock item or a text line with a dashes, or equal signs in the description will not work correctly with the hold print function.
This is because the line will not be printed in the correct order once all the orders and printed together on the one kitchen docket.
Instead, you can use the Print Group Shift function to insert the line in the order.
There are two ways to use the Print Group Shift Function with Hold Print to insert a line/s into an order:
Note!
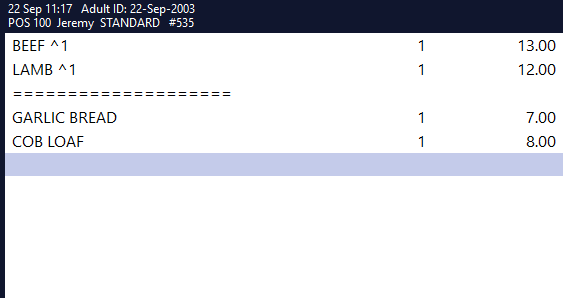
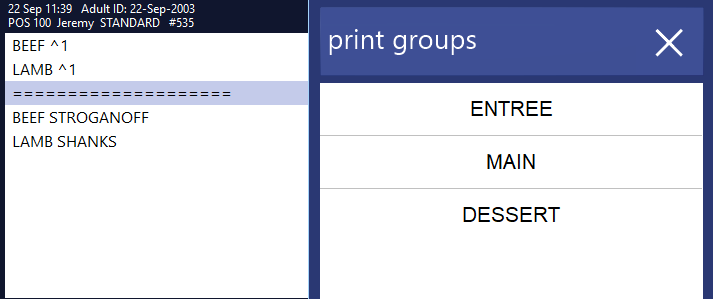
If the Restaurant Module is not used, neither method will show the Print Group NAME on the kitchen docket, rather the name will be replaced with equal signs to clearly separate the item on the kitchen docket.
This method describes the process in setting up the Print Group Shift Function when inserting only one line into an order.
This would be used typically to separate Entrees from Main Meals.
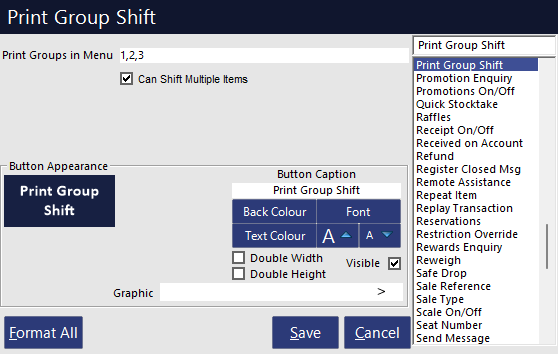
Create Print Group Shift Button
To create a Print Group Shift button to insert only one line into a sale:
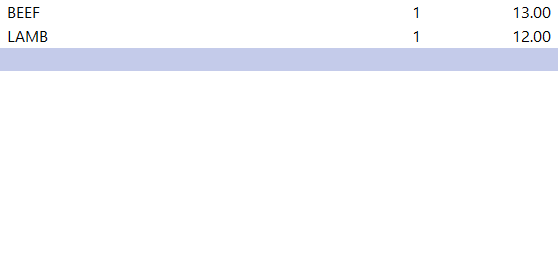
How to enter a sale with a single line to separate Entrée from the Main Meals
This method describes the process in setting up the Print Group Shift Function when inserting multiple lines into an order.
This would be used typically to separate Starters, Entrees, Mains, and Desserts etc.
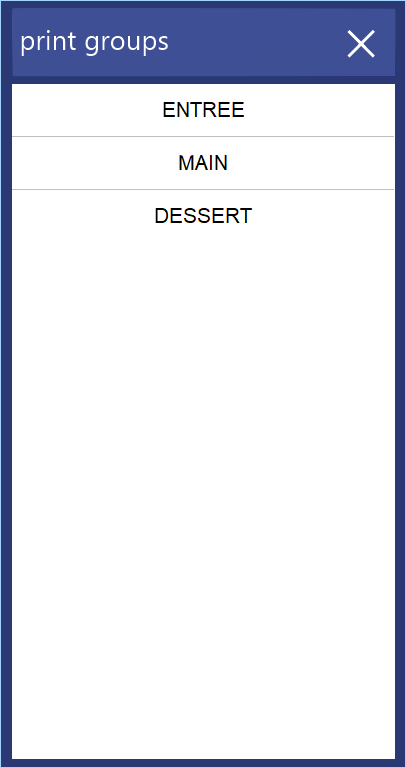
This method works by showing a list of Print Groups to choose from, so the items above the line will be grouped with the appropriate print group number.
Create Print Group Shift Button
To create a Print Group Shift button to insert multiple lines into one sale:
How to enter a Sale using multiple lines to separate Entrées, Mains and Desserts
If you have already entered items into the sale and chosen the print group, you can change the print group they are linked to by selecting the line, and then pressing the print group to reselect a new print group.
You will see the print group numbers on each line item change to the new print group.
If you have already entered your entrees and mains and forgot to assign the entrees to a print group, you can insert the link between the entrees and main meals.
In the example below, two entrees have been entered first, followed by two mains.
To assign the two entrees to the entrée print group, select the line below the last entrée entered, and then select the entrée print group.
The line selected will be moved down a line, and a print line will be inserted in between the entrée and main.
The entrees will have the print group number assigned to their line.
